This tutorial is for Nurse Natalie’s sister, who recently began sewing. For a bowl cozy, visit YouTube and search for “The Crafty Gemini Bowl Cozy.”
A jar opener is a relatively quick and inexpensive project to sew, and are, in my opinion, a fantastic gift. A 6″X6″ square is 2.4% of a yard of fabric, and $0.34. The 6″X6″ of a 12″X5′ roll of inexpensive shelf liner ($1.08/roll) is $0.06. Two fabrics, one shelf liner, $0.74. Not bad for a gift that has utility.
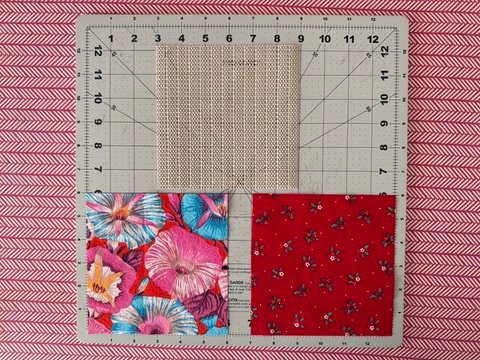
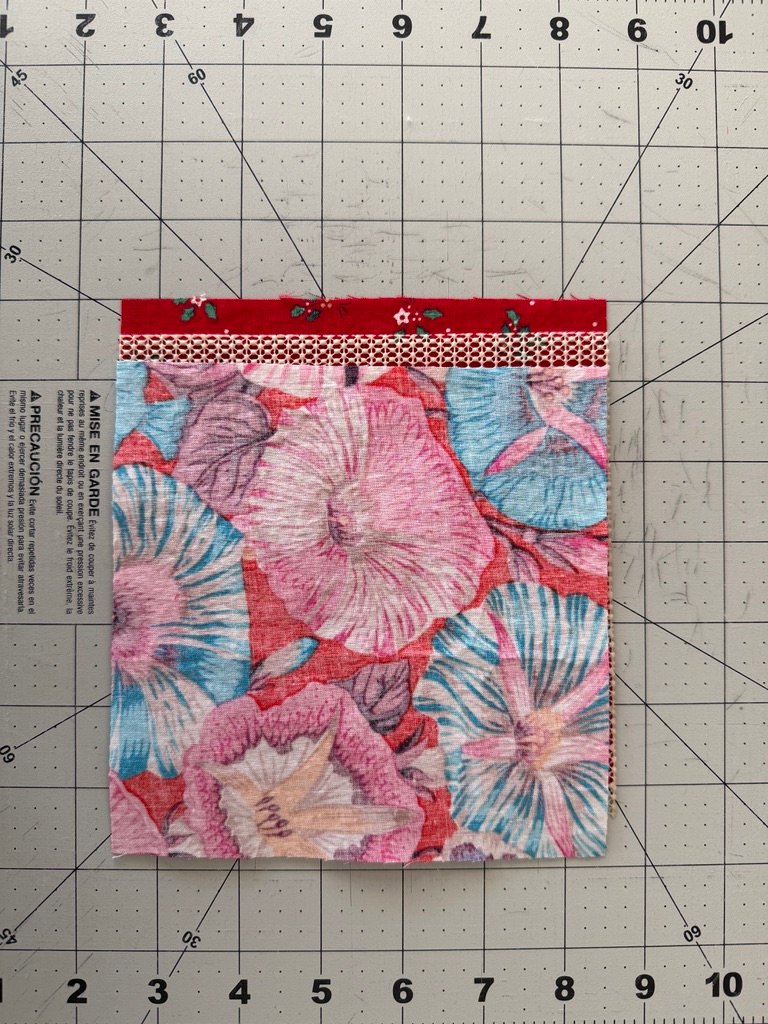
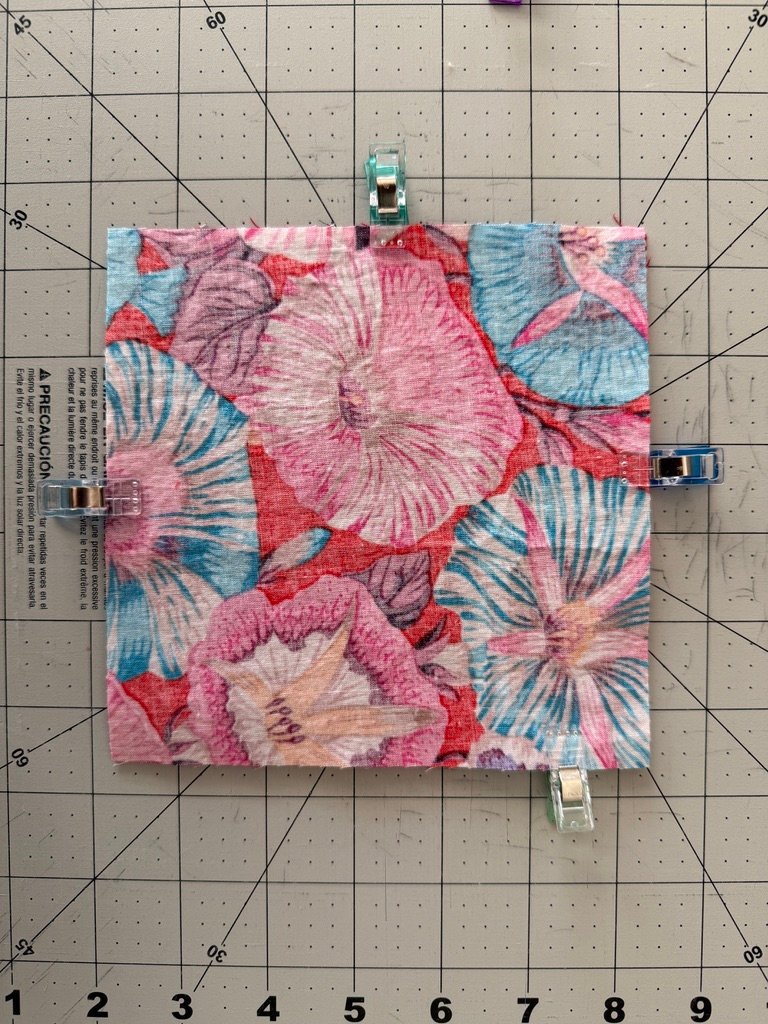
Image #1: two 6″X6″ fabric blocks and one 6″X6″ shelf liner. Face fabric and unseen (only viewable through shelf liner.
Image #2: Unseen fabric right side up, shelf liner, face fabric wrong side up. The offset of the materials in image #2 is for clarification. Before sewing, register all three fabrics on top of each other as in image #3.
Image #3: clip the three layers together at 9 o’clock, 12 o’clock, 2 o’clock, and 5 o’clock. Begin a 1/4″ seam allowance up from the bottom right corner 1.25″ – 1.5″. Sew clockwise to 1.25″ – 1.5″ down from the upper right corner. This will leave an opening through which to turn the materials right side out.
After clipping layers together, turn project over and inspect for any winkles or puckers in the fabrics. Loosen clips and adjust fabrics as necessary.
Turning Right Sides Out. The three pieces will turn right side out in this order: shelf liner, fabric, fabric. It is possible, however, to turn the face fabric to the outside or turn the backing (unseen) fabric to the outside. Be aware and take care. Once turned right side out, push the corners out fully, first with a finger, then a chopstick like item. Fiddle with the opening, aligning the three layers with the outside edge. Secure the opening with clips.
Topstitch Around at 1/16″ or 3/32″. I topstitch around with the face fabric up, which places the shelf liner down. When resistance of the shelf liner against the machine body begins to cause drag, I lift the left edges of the opener off the machine body, reducing drag. This has been successful with a walking foot and standard foot. To eliminate ripples in the material from generating because of drag, I remove any clips below the pressure foot from along the bottom edge of the opener. I occasionally stop sewing to smooth the materials from the center toward the bottom right hand corner and bottom edge. This keeps wrinkles/puckers from developing.
Tacking Stitches Near The Middle. After topstitching around, smooth out the materials and sew a line of stitches near the middle: 1.25″ – 1.5″. This will anchor the middle of the opener as torque is applied.